
Detecting motion can be tricky if you have multiple motion sensors in the same room or if motion sensors have a certain dependency on each other. In this Home Assistant tutorial, I explain how you can best set up motion sensors and make automations based on a number of use cases so that they work perfectly for every use case.
Click the image to watch the video
⭐⭐⭐ NOTE: ⭐⭐⭐
This article accompanies a YouTube video. I wrote it for people who would rather read than watch a video. To keep doing this, I would like to ask you to check out the video, leave a comment under the video, give the video a thumbs up, and subscribe to my YouTube channel. This means that the video is offered more often to new visitors so that they also stay informed of the latest Home Assistant tutorials.
Thank you for your support!
Ed
Motion sensors are generally the first devices you purchase after purchasing your lighting. Most people start by controlling their lighting with motion sensors in Home Assistant. but you can use motion sensors for many more things. How about triggering your alarm system, for example. Or, send a message to your phone or to your smart speaker when a letter is put in your mailbox. If one motion sensor controls your lighting in a certain room, that is fairly easy to set up. However, if several motion sensors have to work together to control the lighting in one or more rooms, it is sometimes difficult to get them to work together in the right way. In this tutorial, I’ll show you how to set up motion sensors in Home Assistant in a few everyday use cases.
The code used in this video can be downloaded here.
The Use Cases
Let’s go through some use cases:
Use Case 1 – Setting up one Motion Sensor in Home Assistant

One motion sensor controls one lamp in one room.
The lamp turns on when motion is detected. When no movement is detected for 5 minutes then turn off the lamp.
Use Case 2 – A bit more complicated option: Setting up Two Motion Sensors with Two Lights in Home Assistant

- We have a hall with one lamp inside and one lamp outside.
- There is a motion sensor in the hall and one at the outside door.
- The outside light and the light in the hall are switched on when motion is detected outside.
- When I go in, the light in the hall stays on as long as I stay in the hall, but the outside light goes out after 5 minutes of inactivity.
- When I leave the hall to enter the rest of my house, the light in the hall goes out.
- When I enter the hall from my house, only the light in the hall comes on. The outside lighting remains off.
- When I then walk outside, the outside lights also come on and the hall light goes out after 5 minutes.
- The outside lights go out after 5 minutes of inactivity
Use Case 3 – The Challenge: Setting up Three Motion Sensors with Three Lights in Home Assistant
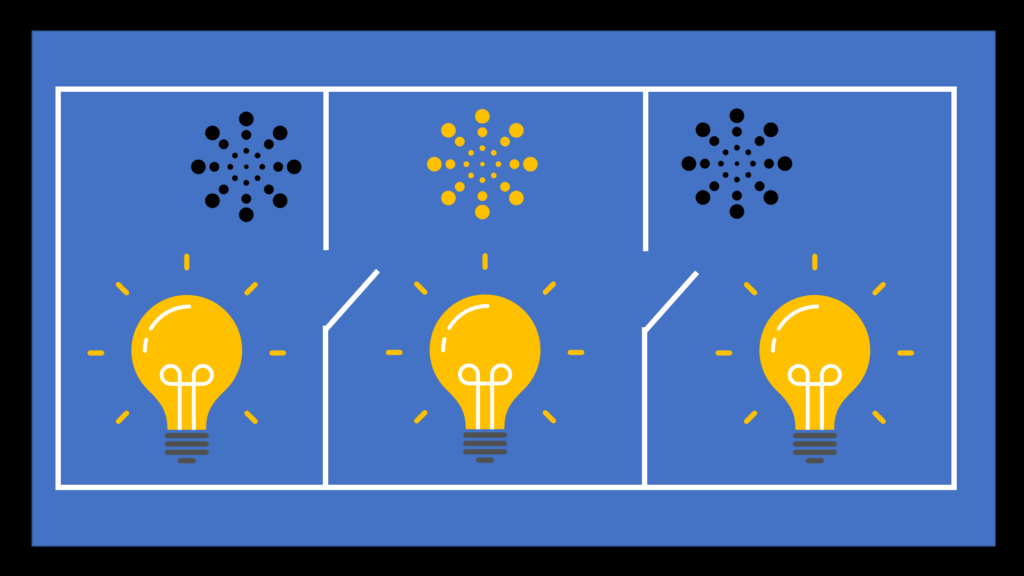
- We have three rooms.
- Room 1 is a staircase that leads to the basement.
- Room 2 is the boiler room to which the stairs lead.
- Room 3 is the garage behind the boiler room.
- So I walk down the stairs, enter the boiler room and then enter the garage.
- There is a lamp and a motion sensor in each room.
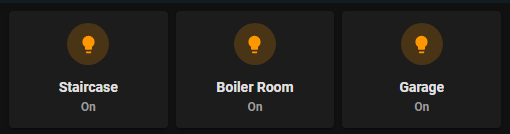
- When you walk down the stairs, the light at the stairs and the boiler room will come on.
- When you get to the boiler room, the light at the stairs, the garage, and the boiler room will turn on.
- When you enter the garage, the light in the garage and boiler room will turn on.
- When I’m in the garage for a while, only the light in the garage stays on and the light in the boiler room and the light in the staircase goes out.
- When I’ve left all the rooms, all the lights go out.
Automations
Use Case 1: 1 Room with 1 Motion Sensor and 1 Lamp

The code used in this video can be downloaded here.
Let’s start with the simplest use case. We have 1 motion sensor and 1 lamp. When the motion sensor detects movement, the lamp turns on. If the motion sensor does not detect any movement for 5 minutes, the lamp will turn off.
The automation looks like this:
This one has a name and the Mode is single.
Next, we create two triggers. I’m using Trigger IDs here. If you don’t know what those are, check out my Trigger IDs video first.
The first trigger is a device trigger which I gave the trigger id motion-detected. You can set the trigger ID under the three dots at the top right of the trigger box.
The device’s name is: “Motion Detector Room 1”. The trigger’s name is: “Motion Detector Room 1 occupancy started detecting motion”. Let’s leave the duration at 0.
Then the second trigger. it doesn’t need a trigger ID. The trigger type is again Device. The device’s name is: “Motion Detector Room 1”. The trigger’s name is: “Motion Detector Room 1 occupancy stopped detecting motion”. Here we set the duration to 5 minutes. After all, we want the light to go out if no movement has been detected for 5 minutes.
Actions
Then we go to the actions. We start with an if-then action type. At the “If” we create a condition and check for the trigger ID by choosing the condition type “Triggered by” and choosing the trigger ID “motion-detected”.
Then we set at Then which lamp should turn on. We create an action with action type Device. The Device is Light Room 1 and the action is Turn On Light Room 1
Now we set when the lamp should go out. We do this by creating an action under Else of the type device. The Device here is also Light Room 1 and the action is “Turn Off Light Room 1”
Use Case 2: 2 Rooms with 1 Motion Sensor and 1 Lamp for each room

The code used in this video can be downloaded here.
In this automation, we will operate two lamps with two motion sensors. When someone approaches the house, the lamp outside and the lamp inside the hall comes on. Then when the person enters, the light in the hall stays on as long as he stays in the hall. The outdoor lamp turns off after 5 minutes of inactivity. If the person then leaves the hall and continues into the house, the lamp in the hall will go out after 5 minutes. When he walks back into the hall, only the light in the hall comes on. If he then walks outside, the outdoor lamp will also turn on and the inner lamp will turn off after 5 minutes. If he is 5 minutes away from home, the outside light also goes out.
This automation has a name again and the Mode is single.
We are now going to create the triggers for the lamps. For each lamp, we create a trigger for when movement has been detected and if there is no movement for 5 minutes.
The Triggers
Detect motion started
We will first define the triggers for our motion sensors in Home Assistant. We start with a Device Trigger with Trigger ID “motion-detected-outside”. The device’s name is: Motion detector Hall Outside. The trigger’s name is: Motion Detector Hall Outside occupancy started detecting motion.
Let’s leave the duration at 0.
We do the same for the interior lighting. This Device Trigger’s Trigger ID is: “motion-detected-inside”. The device’s name is: Motion detector Hall Inside. The trigger’s name is: Motion Detector Hall Inside occupancy started detecting motion.
We also leave the duration at 0 here.
Detect motion stOPPED
Now we define the triggers that detect the stopping of motion.
The next Device Trigger has Trigger ID “motion-stopped-outside”. The device’s name is Motion detector Hall Outside. The trigger’s name is: Motion Detector Hall Outside occupancy stopped detecting motion.
We set the duration to 5 minutes because we want the light to go out only after there has been no movement for 5 minutes.
We also do the same for the interior lighting. This Device Trigger has Trigger ID “motion-stopped-inside”. The device’s name is Motion detector Hall Inside. The trigger’s name is: Motion Detector Hall Inside occupancy stopped detecting motion. Here we also set the duration to 5 minutes.
The actions
Then we go to the actions.
We first define a Choose action with a number of options within it.
Detect motion outside
The first option turns on the outside light when movement is detected outside. The condition is a Triggered By condition that checks for the motion-detected-outside trigger ID.
The actions that go with this turn on the light outside and inside. The first action is of type device and the device is Light Hall Outside. The action performed is Turn On Light Hall Outside.
The second action is also of type device and the device is Light Hall Inside. The action is Turn On Light Hall Inside.
DETECT MOTION STOPPED OUTSIDE
The second option ensures that the light outside turns off after 5 minutes.
The condition type is Triggered by and the trigger is motion-stopped-outside. The action is of type device and the device is Light Hall Outside. The action performed is Turn Off Light Hall Outside.
DETECT MOTION INSIDE
The third option turns on the indoor light when motion is detected indoors. The condition is a Triggered By condition that checks for the motion-detected-inside trigger ID.
The associated action turns on the light inside. This action is of type device and the device is Light Hall Inside. The action is Turn On Light Hall Inside.
DETECT MOTION STOPPED INSIDE
The fourth option ensures that the light inside goes out after 5 minutes.
The condition type is Triggered by and the trigger is motion-stopped-inside. The action is of type device and the device is Light Hall Inside. The action is Turn Off Light Hall Inside.
Now the second use case also works!

I need your help!
You will be doing me a huge favor if you subscribe to my channel if you haven’t already. And, you will help me a lot if you also give this video a thumbs up and leave a comment. This way, YouTube will present this video to new people, making the channel grow! In the video description, you will also find information about how you can sponsor me so that I can continue to make these tutorials for you.
Thank you!
Use Case 3: 3 Rooms with 1 Motion Sensor and 1 Lamp for each room in Home Assistant
The code used in this video can be downloaded here.
Let’s open this automation.
This automation will ensure that the light follows us when we walk through three rooms, but in some cases also illuminates the next room. This won’t quite work with just three motion sensors, but the end result will still be satisfying.
This automation again has a name and has mode Single.
We will first define the triggers for the motion sensors in Home Assistant. For each motion sensor we define a trigger to detect motion and to stop detecting motion.
The Triggers
Detect motion started
We start with the motion detector of the staircase. As you can see here I defined a trigger id called motion-detected-staircase. If you don’t know what trigger ids are, check out my video about trigger ids first.
Then we select the device. In this case it is the Motion Detector Staircase.
The trigger we want to check for is Motion Detector Staircase occupancy started detecting motion. In my case, this trigger is called that because I use an Aqara motion sensor in combination with Zigbee2MQTT. If you use a different motion sensor or for example ZHA or deCONZ, the trigger can have a different name, but you have to choose the trigger that detects movement.
Let’s leave the duration at 0.
Now we are going to create the same trigger for the boiler room and the garage.
So, the Boiler Room gets the trigger id motion-detected-boiler-room. I choose the device “Motion Detector Boiler Room” and I choose the trigger “Motion Detector Boiler Room occupancy started detecting motion”. Let’s leave the Duration at 0 again.
And the Garage’s trigger-id name is: “motion-detected-garage”. I choose the device “Motion Detector Garage” and I choose the trigger “Motion Detector Garage occupancy started detecting motion”. Let’s leave the Duration at 0 again here.
Detect motion stopped
Next, we need to create triggers for detecting that there is no more movement in the rooms.
Here we do the same for all three motion sensors.
We start with the staircase.
The staircase’s trigger-id name is: “motion-stopped-staircase”. I choose the device Motion Detector Staircase and choose the trigger Motion Detector Staircase occupancy stopped detecting motion. This time we set the duration to 5 minutes. So, the trigger will go off as soon as there has been no movement in the staircase for 5 minutes.
We do the same for the boiler room and the garage.
The boiler room’s trigger-id name is: “motion-stopped-boiler-room”. I choose the device Motion Detector Boiler Room and choose the trigger Motion Detector Boiler room occupancy stopped detecting motion. We also set the duration at 5 minutes here.
The garage gets the motion-stopped-garage trigger id. I choose the device Motion Detector Garage and choose the trigger Motion Detector Garage room occupancy stopped detecting motion. And here again, we set the duration to 5 minutes.
The Actions
Now, let’s go to the actions. I start by defining a Choose action. Within that, we have a couple of options that correspond to the triggers we defined above.
Turning on the Light in the staircase and Boiler Room
The first condition is of type: “Triggered by”. This references the motion-detected-staircase trigger ID. If movement is detected in the staircase, the light in the staircase and boiler room turns on. So, the actions are then as follows: The first action is a device action that refers to the lamp in the staircase. The name of this lamp is Light Staircase. The action is: “Turn on Light Staircase”. However, we also want the light in the boiler room to turn on, so we define another device action that references the device Light Boiler Room. The action is: “Turn on Light Boiler Room”.
Turning on the LIGHT IN THE Staircase, Boiler Room, and Garage
The second condition is of type: “Triggered by”. This references the motion-detected-boiler-room trigger ID. If the motion is detected in the boiler room, we want the light to turn on in the staircase and in the boiler room, and in the garage. So, the actions are then as follows:
The first action is a device action that refers to the lamp in the staircase. The name of this lamp is Light Staircase. The action to be executed is “Turn on Light Staircase”.
However, we also want the light in the boiler room to turn on, so we define another device action that refers to the device Light Boiler Room. The action is: “Turn on Light Boiler Room”.
And we also want the light in the garage to turn on, so we define another device action that references the Light Garage device. The action is: “Turn on Light Garage”.
TURNING ON THE LIGHT IN THE GARAGE
To make sure the light stays on as long as we’re in the garage, we’re going to add a third option.
The third condition is of type: “Triggered by”. This references the motion-detected-garage trigger ID. When motion is detected in the garage, the light in the garage turns on (or stays on).
So, the action is a device action that refers to the lamp in the garage. The name of this lamp is Light Garage. The action is: “Turn on Light Garage”.
Turning Off the Lights
Now we are going to create the actions that will turn off the light. They are actually very simple. If there has been no movement within 5 minutes in a certain room, the light in that room may go out.
To do this, we make one option for each room to switch off the light. We start with the staircase.
In option 4 we have a condition type “triggered by” and the trigger is called “motion-stopped-staircase”. The action is again a device action and the device is called Light Staircase. The action is “Turn Off Light Staircase”.
We do the same for the boiler room and garage in option 5 and option 6. Option 5 turns off the light in the boiler room based on the condition “motion-stopped-boiler-room” and Option 6 turns off the light in the garage on basis of the condition: “motion-stopped-garage”.
And with that, the automation is complete. The light now follows you nicely as you walk from the stairway to the garage or from the garage to the stairway. If you walk back and the light in the boiler room and stairway is already off, the light in the boiler room and stairway will turn on again as soon as the motion sensor in the boiler room detects your presence. So you have to pay close attention to where you place your motion sensor in the boiler room so that it sees you in time.
Use Case 4: Turn off the lights if someone approached the house and decides not to go in.
The code used in this video can be downloaded here.
Currently, in Use Case 2, if someone approaches the house, the lights outside and inside turn on. If he decides not to enter the house, only the outside light will turn off. To fix this use case, we have to add a Helper Group of type binary sensor to Home Assistant. Let’s call the Helper Group “all motion sensors hall”. Add the motion sensor for the hall outside and the motion sensor for the hall inside to this group. Leave the setting “All entities” to off.
Now, create an automation that turns off all lights if all motion sensors stopped detecting motion for 5 minutes.
Use Case 5: Turn off the lights if someone only enters the boiler room, does not enter the garage, and goes back upstairs.
The code used in this video can be downloaded here.
Currently, in Use Case 3, if someone enters the boiler room, the lights in the staircase, boiler room, and garage turn on. If he decides not to enter the garage, only the light in the boiler room and staircase will turn off. The light in the garage will stay turned on. To fix this use case, we have to add a Helper Group of type binary sensor to Home Assistant. Let’s call the Helper Group “all motion sensors”. Add the motion sensor for the staircase, the boiler room, and the garage to this group. Leave the setting “All entities” to off.
Now, create an automation that turns off all lights if all motion sensors in Home Assistant stopped detecting motion for 5 minutes.
Outtro
I hope this video gave you some ideas on how to use motion sensors in Home Assistant. Let me know in the comments if it works for you!
Your support allows me to make new videos all the time. You can support me by becoming my Patron, buying me a cup of coffee, or joining this channel.
Please don’t forget to give this video a thumbs up, subscribe to my channel, and check the notification bell.
I look forward to seeing you next time!
Bye bye.