
In quite some cases you might want to trigger a certain action after a specific time interval. For instance, turning off the lights after there has been no motion for 5 minutes. This can be done in various ways in Home Assistant, but in most cases, this fails as soon as Home Assistant gets restarted during that time interval. In this tutorial, I will show you how you can set up timers in Home Assistant that will keep working even when Home Assistant gets restarted.
⭐⭐⭐ NOTE: ⭐⭐⭐
This article accompanies a YouTube video. I wrote it for people who would rather read than watch a video. To keep doing this, I want to ask you to check out the video, leave a comment under the video, give the video a thumbs up, and subscribe to my YouTube channel. This means that the video is offered more often to new visitors so that they also stay informed of the latest Home Assistant tutorials.
Thank you for your support!
Ed
Introduction of how Timers work
Home Assistant has a couple of ways to deal with delay time before an action is triggered. For instance, when you create an automation, you can enter a time in the For: field at a Trigger like this.
The trigger will only fire if the trigger condition is true during this time span.
Another way to use a delay time is to use the delay action within an automation. When you create an action in Home Assistant, you can choose the Wait for time to pass or delay action and enter a duration before the next action will be taken like so.
These are fairly simple ways to introduce a delay in your automations, but they have one downside. Namely, they won’t survive a restart of Home Assistant. So, if the delay is started and Home Assistant is restarted while the delay is running, the delay time will be gone and the next action within your automation will never start. This might result in unwanted behavior such as that the lights will stay on at night or that your garden sprinkler will keep watering your garden forever.
Now there are various ways to fix this, but the easiest way is to use a Timer helper instead of a delay.
The Timer helper does survive a restart of Home Assistant, so the timer will continue to work even when Home Assistant is restarted.
Let’s set up a timer automation to show how they actually work. This is just one example of how you can use Timers. There are countless use cases that you can think of. I am only trying to give some insight here into how timers work.
Create the Timer Helper
First, we have to create a timer
- Click Settings
- Click Devices & Services
- Click Helpers
- Click Create Helper
- Select Timer
- Enter a name for your Timer
- In this case: Light Timer
- Select an icon
- And click Restore
- Click Create
A timer can have different states:
- The timer is Idle when it’s finished, canceled, or never started
- The timer is Active when it is currently running
- The timer has the state Paused when it is paused
We can check the status of timers using events in Home Assistant. So we can see if the timer is canceled, finished, started, restarted, or paused. We are going to check if the timer is finished or canceled in this example to keep it simple.
In our use case, we are going to use the random function of Home Assistant to turn off the lights after a random time interval between 1 and 30 minutes. In this case, it can happen that Home Assistant gets restarted in between. I will show you that the timer will still be alive after the restart.
I created a simple dashboard that contains the status of the light and the status of the timer so that we can follow the progress of our timer.
Create the Automation for our Timer
Let’s create the automation!
- Click on Settings.
- Click on Automations and Scenes.
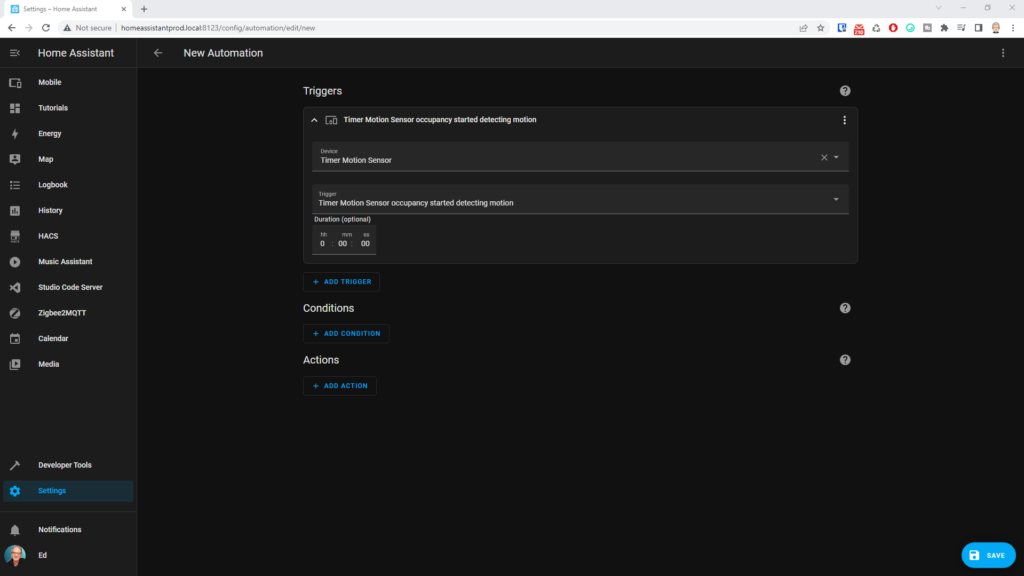
- Click on Create Automation and start with an empty automation.
- Click on Add trigger.
- Select Manual event.
- At event type, type timer.finished.
- At event data, type entity_id: timer.light_timer which is our helper.
- Click on the three dots.
- Click on Edit Id and give this trigger the Trigger-ID Timer finished.
- Now add another trigger.
- Click on Add Trigger.
- Select Device.
- Select your motion sensor.
- And at the trigger select Motion sensor stopped detecting motion.
- Click the three dots.
- Click Edit ID and give this trigger the Trigger ID Motion Stopped.
- Add another trigger.
- Click on Add Trigger.
- Select Device.
- Select your motion sensor and select this time Motion sensor started detecting motion.
- Click on the three dots. Click on Edit ID and give this trigger the Trigger ID Motion detected.
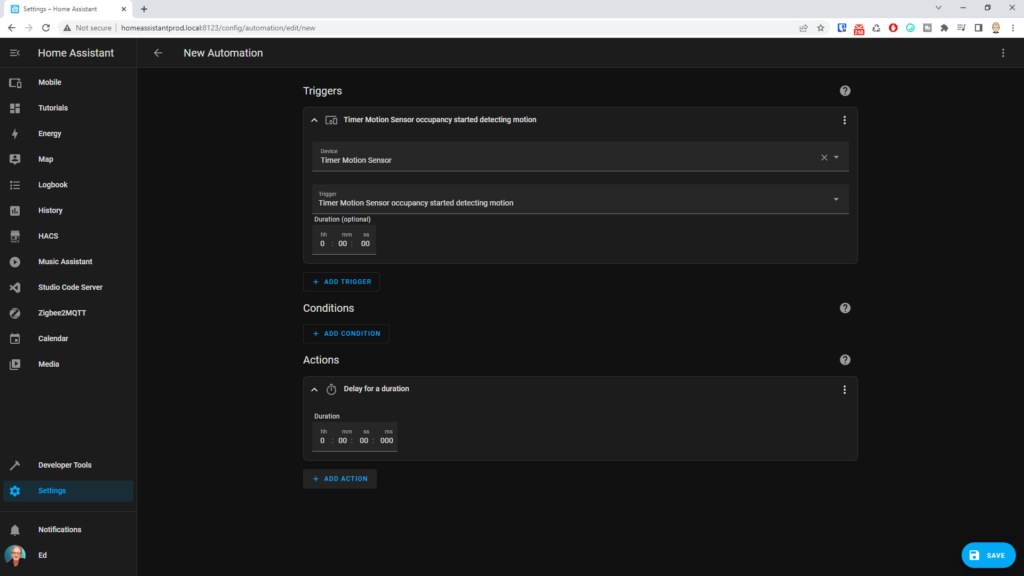
- Now go to Actions.
- Click on Add Action.
- Select Choose and edit option 1.
- Click on Edit Condition.
- Select Triggered By.
- Select the trigger Motion stopped.
- Now add an action.
- Select Call Service and as a service select timer.start.
- At Choose Entity choose your timer Light Timer and enter a duration.
- You can enter a fixed duration, 10 in this case, but we’re going to change it because we want to have a random duration, so we click on the three dots and we’re going to edit in YAML and we’re going to change the duration value by this code.
- We are going to enter a range between 60 and 1800 seconds and generate a random number in between.
- So, it gives a duration of between 1 minute and 30 minutes.
- Add a new option.
- At condition select Triggered By.
- This time select Motion Detected.
- We’re going to add an action. This time Call Service and the service is timer.cancel. We’re going to choose the entity our Light Timer again, and we’re going to add another action Device.
- We choose our lights. In my case Office Front and we’re going to say Turn On Office Front.
- We’re going to add another option.
- Click on Add Option.
- Click Add Condition, again Triggered By. This time the trigger is Timer Finished.
- Then click Add Action. Select again Device. We’re going to select the lights again: Office Front. And now we’re going to turn off the lights. Save this automation and give it a meaningful name. In my case: Timer: Switch Light on Motion based on Timer.
- Click Save.

I need your help!
You will be doing me a huge favor if you subscribe to my channel if you haven’t already. And, you will help me a lot if you also give this video a thumbs up and leave a comment. This way, YouTube will present this video to new people, making the channel grow! In the video description, you will also find information about how you can sponsor me so that I can continue to make these tutorials for you.
Thank you!
Test the Automation
Now, let’s test the automation.
When motion is detected, the timer will be canceled or idle. As soon as the timer gets canceled, it will get the status idle straight after that, so we won’t really see the canceled state in our dashboard. Now, let’s make sure that there’s no motion detected. As you can see, the light timer starts as soon as there’s no motion detected anymore. The timer value will be a value somewhere between 1 and 30 minutes and will start counting down. Now, let’s restart Home Assistant to see if the timer is still alive after the restart.
- Go to Settings.
- Go to System and click on Restart.
Yes! The timer is still alive and the lights will turn off as soon as the timer reaches 0. If motion is detected in the meantime, the light timer will be canceled, and gets the status idle again.
Note: The documentation of the timer helper states that if timers end while Home Assistant is down (or restart), that the timer.finished event will be triggered at the start of Home Assistant. Unfortunately, that is not the case. While I was creating this video I found out that this is not working. So, if the timer finishes while Home Assistant is down, the timer.finished event is never triggered (at the moment) and the actions that should take place on a timer.triggered event will not be executed. For now, I consider this an edge case and hopefully, this will be fixed in the future. Getting that to work might be a challenge though.
I hope it made clear how timers work and what the benefits of timers are. They take a little bit more time to set up than a delay, but the fact that they survive a restart of Home Assistant is well worth it.
You can download the code that I’ve created for this video via the ko-fi link in the description below. Downloading is free, but if it is worth something to you, you can also enter an amount there to support my work. Please consider sponsoring me if my work saves you time. This way you support me so that I can continue to make these videos for you.
I want to thank everyone who has supported me in making these videos and tutorials so far. I could never have done this without you. Thank you! You can support me through Patreon, Ko-Fi, or by joining my channel. If you also want to support me, look in the description of this video for the links. With that, you make it possible that I can continue to make these videos for you.
Oh, don’t forget to give this video a thumbs up, subscribe to my channel, and hit the notification bell.
I will see you soon!
Bye bye!